From Old Fuse Boxes to Modern Protection: What a Switchboard Upgrade Actually Includes
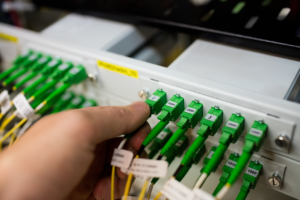 If you’ve ever opened your meter box and seen old ceramic fuses, brittle labels or a tangle of ageing wiring, you’re not alone.
We see it every week.
For many homeowners, the idea of switchboard upgrades feels technical, disruptive, and slightly intimidating. There’s a perception that something major is about to happen behind that metal door — and not knowing exactly what’s involved can make it easy to put off.
So, let’s walk through it properly.
No jargon. No scare tactics. Just a clear, behind-the-scenes look at what actually happens during switchboard upgrades, why they matter, and what you can expect on the day.
Why Older Switchboards Become a Problem
Most older homes across Australia were built with ceramic rewireable fuses. At the time, they were standard. But household electricity demands have changed dramatically.
Air conditioning, induction cooktops, home offices, EV chargers — modern living pulls far more electricity through your electrical switchboard than homes did 30 or 40 years ago.
Old switchboards weren’t designed for that load.
The most common issues we find during inspections include:
- No safety switches (RCDs) installed
- Ageing wiring that no longer meets Australian Standards
- Overcrowded fuse holders
- Signs of heat damage around connections
- Circuits that have been added over time without proper labelling
None of these automatically mean something catastrophic is about to happen. But they do mean your system lacks the modern protection required to safely manage today’s electrical demands.
That’s where switchboard upgrades come in.
Step 1: Inspection and Safety Isolation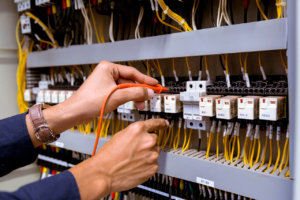
Before any upgrading switchboards work begins, the first job is assessment.
A licensed electrician will inspect the existing switchboard, check the condition of the wiring, confirm the number of circuits, and test for earthing compliance. This isn’t a quick glance — it’s a detailed look at how your home’s electrical system is configured.
Power is then safely isolated at the point of supply. We confirm there’s no live electricity before touching anything. Safety isn’t just a box to tick — it’s the foundation of every switchboard upgrade.
Step 2: Removing Old Fuse Components
If you currently have ceramic fuses, they’ll be removed.
Old fuse bases are disconnected carefully. In many cases, the internal wiring needs to be extended or reorganised to suit modern circuit breakers and safety devices.
This is also when we check for heat damage behind the panel — something homeowners rarely see. Over time, loose fuse connections can cause hotspots. If we find damaged cabling, it’s replaced.
This stage is often the messiest part of switchboard upgrades, but it’s also where the real safety improvements begin.
Step 3: Installing Modern Circuit Breakers
Instead of replaceable fuse wire, modern electrical switchboards use circuit breakers.
Circuit breakers automatically trip when a circuit overloads or short circuits. Unlike ceramic fuses, they can simply be reset. No rewiring required.
Each circuit — lighting, power, oven, air conditioning — gets its own clearly labelled breaker. This improves fault-finding and makes managing your electricity far simpler.
Properly installed circuit breakers also respond much faster than old fuse systems, reducing fire risk and wiring damage.
Step 4: Adding RCD Protection (Safety Switches)
This is arguably the most important part of switchboard upgrades.
Residual Current Devices (RCDs), often called safety switches, monitor the flow of electricity. If they detect even a small imbalance — like electricity flowing through a person — they shut the circuit off in milliseconds.
Modern regulations require RCD protection on power and lighting circuits in most residential installations.
If your current switchboard doesn’t have RCDs, upgrading switchboards to include them significantly reduces electrocution risk.
For families, this upgrade alone provides enormous peace of mind.
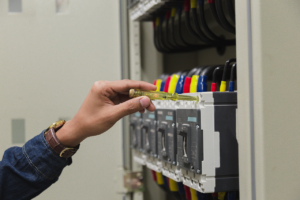
Step 5: Surge Protection Installation
Power surges don’t just come from lightning strikes. They also occur from network switching or internal load changes.
As part of many switchboard upgrades, we now recommend installing surge protection devices. These units protect sensitive appliances and electronics from voltage spikes.
Given how reliant households are on computers, smart home systems and expensive appliances, surge protection has become a practical addition to modern electrical switchboards.
Step 6: Reorganising and Labelling Circuits
One underrated benefit of upgrading switchboards is clarity.
Older switchboards often have faded handwriting or incomplete labels. During a switchboard upgrade, every circuit is clearly identified and labelled.
This makes future maintenance easier — whether you’re isolating a kitchen appliance or planning renovations.
Professional electricians take the time to organise internal cabling neatly. It might not be visible once the cover goes back on, but tidy wiring improves airflow, reduces heat build-up, and simplifies future servicing.
Step 7: Testing and Compliance Certification
Before power is restored, the entire system is tested.
We verify:
- Correct RCD operation
- Proper earthing continuity
- Circuit breaker response
- Voltage stability
- Load balancing
As licensed master electricians, we ensure all switchboard upgrades comply with AS/NZS 3000 Wiring Rules.
Once testing is complete, power is re-energised and each circuit is individually confirmed operational.
You’re not just left with “new parts”. You’re left with a verified, compliant, safer electrical system.
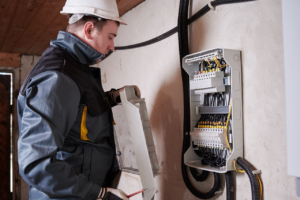 How Long Do Switchboard Upgrades Take?
In most standard residential homes, switchboard upgrades take between four and eight hours.
If there are complications — asbestos panels, deteriorated wiring, or supply authority coordination — it may extend slightly. A transparent electrician will explain this before starting.
There’s no mystery. Just process.
Common Concerns Homeowners Have
“Will my power be off all day?”
Yes, during the active upgrade period. We advise planning around it. But once completed, power returns the same day.
“Is it messy?”
There’s minor dust during removal, but experienced electricians keep disruption contained and clean up thoroughly.
“Is it really necessary?”
If your electrical switchboard still runs ceramic fuses or lacks RCDs, then yes — switchboard upgrades are strongly recommended for safety and compliance.
When Should You Consider a Switchboard Upgrade?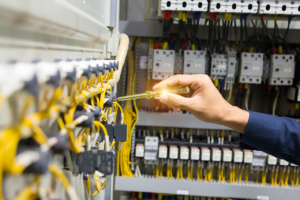
You should consider switchboard upgrades if:
- You’re renovating
- You’re installing solar
- You’re adding an EV charger
- Your breakers trip frequently
- Your home still uses ceramic fuses
- You’ve been advised your switchboard is non-compliant
Upgrading switchboards isn’t about selling unnecessary work. It’s about ensuring your home can safely handle modern electricity demands.
What You’re Really Paying For
A switchboard upgrade isn’t just a box replacement.
You’re paying for:
- Modern circuit breakers
- RCD protection
- Surge protection
- Compliant wiring
- Professional installation
- Testing and certification
You’re also paying for risk reduction.
Electricity is unforgiving when systems fail. Properly completed switchboard upgrades dramatically reduce fire and electrocution risks.
Final Thoughts
From the outside, a switchboard looks simple.
Inside, it’s the control centre for your entire home’s electricity.
Switchboard upgrades replace outdated protection with modern safeguards designed for today’s electrical loads. They’re not flashy. They don’t change how your home looks. But they change how safely it operates.
If you’ve been unsure about what’s involved, hopefully this behind-the-scenes look has clarified the process.
No mystery. No guesswork. Just structured, compliant upgrading switchboards carried out by qualified electricians who understand exactly what’s at stake.
And when it’s done properly, you won’t need to think about it again — because your home’s electrical system will simply work, quietly and safely, in the background.